Saturday, February 8, 2014

Newcomer to the DIY world but here are things I love

 Here are a few of my favorite things. Some I use a lot some I have only used once or twice but I absolutely love the outcome from using them. I will keep adding to the list so keep checking back!


1. I absolutely love me some Rust-Oleum products and this by far is the best spray paint EVER
2. I sand A LOT. I have sanded so much I have sanded the sander right off the sander but I love this little guy so easy to use
I bought it on sale for under $30 at Sears

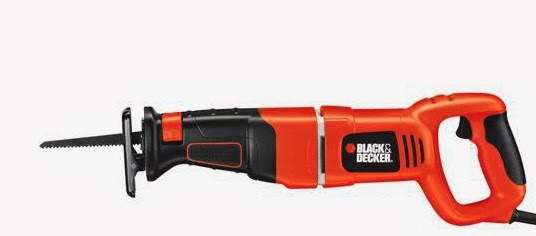
3. When you are breaking down pallets nothing works faster and easier than a reciprocating saw I picked this one up at Walmart for around $50 on sale
I use a diablo blade I bought at Home Depot. I bought a bunch of them because at Christmas time they were a buck but downside was it was a limit one per customer but since I go to Home Depot several times a week I was able to score quite a few.

3. Spaghetti Jars

I can always find a use for these, so I save and save. I have dozens from saving them for a cpl years. My kiddo loves spaghetti!! lol


4. This has been my go-to glue lately
I do really like gorilla glue also but as we have established I am cheap and it can get costly


5. Ramset powder actuated hammer is so much easier to use than a concrete drill bit and drill to anchor into concrete
you can get one at Home Depot make sure you read the package and get the necessary accessories for it. Use the right size hammer too for a better bang!! yes this sounds like a .22 caliber gun going off just so there is no surprise first time you use it.


6. General Finishes!! I cannot say enough about this product (NO they don't pay me but if they did I would take it lol)
in java
you can order this from Amazon. When you place your first order you will also get Woodcraft catalog to order from. I love it!! go buy it now!!!  Woodcraft link


Pony Wall (Half wall)

I have an open concept type of ranch style home and the dining area is really small but works for my small family. I needed some separation between the living and dining so I added a small half wall that measures 3' 1/2" wide x 3' tall. It's pretty easy with the right tools to build this. You may have different flooring than I do so you may not have to use all these steps. My floor is cheap ceramic tile in dining and carpet in the living room (I am hoping to change the carpet in a few weeks to hardwood but that's an entirely different post lol).  I am not going to list the supplies except for the ACTUAL wall but I will tell you what I used for what as I go.

YES! my kitchen/dining is turquoise! I really love that color and if you do too its called Behr Tropical Sea from home depot


Supplies:
~ 2 8ft 2x4
~ 3in screws
~ 4x8 sheet of drywall
~ 1 1x4 birch fence panel (yes I know,weird)
~ paint and primer

Step 1: measure measure measure I cannot stress enough to measure. measure once measure again please trust me on this one. determine how tall and wide you want your wall. I wanted mine to be able to install a bench later (this determined my width) on down the line when I break down and buy the table I want but for now I am using a goodwill refurbished table I picked up for $20. I also wanted to be able to have a conversation with anyone sitting in the living room if I am at the table (this determined my height). My wall is 3' 1/2 x 3'.


Step 2: Cut your 2x4's

you will need to cut 2 2x4's to width of 3 1/2 ft (one for the top one for the bottom and shave off 4 inches)

and then cut 2 of the 2x4's to the height you want the wall then the 2 inside 2x4's cut to fit inside the box


Step 3: make a box (after I made this frame I took it out in the driveway and laid the drywall on top of it and cut the drywall to the size of the frame. It is much easier doing it this way than trying to cut the drywall when its already anchored to the floor IMO. Make sure you cut 2 pieces of drywall to fit both sides.)

build a box

add supports in the middle


Step 4: anchor the frame into the drywall using drywall anchors if there is no stud

Step 5: anchor the bottom into the floor (there are several ways to do this I found the easiest way to do it is using a Ramset powder actuated hammer gun ( I paid around $35 for the hammer and the accessories I needed to complete this job. I bought it because of potential jobs I could use it for) It looks like this Ramset hammer shot accessories you will need yellow boxed boosters and Nails.


Step 6: add the drywall using 2" drywall screws


Step 7: patch any holes or cover screws with joint compound and the corners need to be joined with drywall tape and joint compound after its all dry sand that sucker!!!

you can see the wood filler on the top where I added the screws
Step 8: add your top ( I went really cheap on this I bought a birch fence picket at Lowe's for $1.62 and sanded it down like crazy then painted and cut to size) here is a pic of it taking its first coat of paint after I primed you will paint again after you add it to the frame and fill your screw holes with wood filler and sand but for the most part it was easier for me to paint before I put it on plus I used oil based paint and it stinks to high heaven.
its drying the first coat of paint on top of my washer/dryer pedestal I am working on which is another blog coming soon lol
Step 9: Paint your wall! I only painted the dining side because I haven't figured out the living room color I want yet
Step 10: put your floor back and add trim
my grout box holding the tile down


 Some BEFORE pics


sanded and scraped the floor down to the concrete to get a smooth finish
This tile was broken before I bought house it needed to go anyway

the globs of mortar kinda pissed me off when I saw it made me think it was a crappy job they did
A little tip on the tile I had 6 pieces already stowed away in the garage that matched my floor but I was looking for some that came close or was actually same and a Lowe's manager said that they will cut your tile. I asked at home depot also and no dice. Before I found the ones stashed away in my garage I couldn't justify renting or buying a wet saw for 3 pieces of tile so I set out to borrow one that no one had but was really happy to find Lowe's would do it.

DIY Mason Jar Solar lights (hanging)

Supplies:
~Mason Jars (if you have read earlier posts you know that I use the leftover Classico spaghetti jars in favor of actually buying Mason Jars)
~ Spray Paint (any color I used flat black)
~ Wire
~ Solar Lights (walmart has them for .97 cents in the garden dept.)
~ Thick nail
~ Hammer
~ pliers
easy peasy supplies


No flash just light from the patio


Step 1: Cut a hole in the lid
I used a nail and a hammer to cut the hole out the size of the clear part of the light
(made a circle of holes then used pliers to pull it out. I wished I had taken a pic of this part but I did not, sorry.)

Step 2: Spray paint the lid only (unless of course you want to advertise that you are using a spaghetti jar). Let Dry.

Step 3:  Take the stake out of the light (toss it or save it, whatever. you wont need it again for this project anyway) push it through the hole in the lid

Step 4: take you wire and wrap it tightly around the neck of jar and hang it (I ran the wire thru the slats of the fence)


It will take a cpl days for your lights to go full effect. I have had mine up for a year now and most are still going strong. I had to replace 2 but at .97 cents I wasn't really losing much.

pitch black in the backyard 1

pitch black in the backyard 2

I used a flash with this one sorry


Monday, February 3, 2014

DIY Card Holder... Can be used for Christmas, Valentines, Birthdays, etc


I don't have a fireplace to display cards I get in the mail for holidays and I was using thumbtacks and a wall to display them. Fancy huh? So here you go an easy decorative way to display your cards and can be used year after year.

Supplies:
~Craft Paint
~ Pallet wood sanded 1x4 15-20in long 
~ Spray on Lacquer or something to seal it
~ Printer (if your freehand sucks)
~ Tape
~ Ribbon (holiday specific)
~ Bic Pen
~ WORD or other program to print your message
~ Clothespins (I used 3 different sizes for 3 different signs tiny craft, small office, and regular sized clothespins..I found all 3 at walmart the small office was in the office section, the tiny ones were in the craft section, the regular sized was in the laundry section).
~wax paper
~ Glue (I pretty much use e600 for everything but you can use a glue gun)
~ Staple gun
~ paintbrush

Step 1: I laid the wax paper out covering my entire kitchen table and painted the 1x4 and the little clothespins. Let dry.

Step 2: Printed out my message and cut it down to fit over the 1x4 taped it on there making sure the wording is going to fit on the wood properly I had to print a cpl different sizes to get a perfect fit.
my template


Step 3: Used the bic pen to trace into the wood lettering (I tell you how to do this in previous blog here) and painted it in.added some little decorations on the valentine one I just added some stick on bling and used paint to make dots all over.

painting the lettering in
Step 4: Cut your ribbon to however long you want it to display your cards. (this really depends on if you get 3 cards a year or 300 lol) Cut a piece of ribbon to be able to hang it too.

Step 5: After everything is dried turn it over and staple your ribbon on (3 long pieces to bottom 1 folded piece on top to hang)

Step 6: glue your clothespins on and let dry

Step 7: I used spray lacquer to seal and let dry for 24 hours

waiting for lacquer to dry
Step 8: hang or give as a gift


DIY $2 umbrella stand

I decided I wasn't going to pay $50 bucks for an umbrella stand that anyone hardly sees. I mean really its not like people are sitting around a table outside with their heads stuck under the table and talking about how amazing an umbrella stand is and if they are they need a life lol.

Supplies:
~1 bag of quikrete ( I bought the 60lb because thats the smallest they had in stock)
~1 can of cooking spray (the oily er the better, also got a cheap can for a buck since I wasn't consuming its chemicals) 
~1 plastic planter or really large plastic bowl for a mold
~Water
~ small piece of PVC pipe that your post will fit in (the measurements on this are sketchy because it really depends on what type of mold you use as far as height. the post for all umbrellas are pretty much the same so find one that your post will fit into and cut it to the height of your mold)

Step 1: mix your concrete (read the instructions on the bag its not hard at all)
Step 2: spray sides and bottom of your plastic mold with cooking spray really well
Step 3: situate a piece of pvc sprayed with cooking oil thats been cut to height of mold in the middle (this is to be able to slide your umbrella post in)
Step 4: pour concrete into mold and let it dry at least 24 hours

 If you notice here there's some chipped its only because I am not a patient person and it wasn't fully cured so don't be me and let yours cure
 Also if you really want it to be a conversations piece you can run to the dollar tree and pick up some of their decorator rocks. you will also need some mortar for tiling.Just slap that mortar on and start sticking some rocks on there. I later added a layer of river rocks on the bottom where my impatience shows the chipped area it so it wouldn't look so home made. Not that there is anything wrong with home made mind you.

Table made from Pallets!!


OK so this is another one of my projects that shows how cheap I am. I went on the hunt for a couple of really good pallets I will explain the art of picking a pallet and breaking it down in another blog. This table went with the chairs I posted in an earlier blog (and by earlier I mean the one before this one).

Supplies:
3 inch screws
2 inch screws
sawzall or reciprocating saw
2 pallets (or more depending on how big you want mine is a 3ftx4ft)
Paint (I used craft paint it was what I had on hand and cheap)
Acrylic (or some sort of sealer)
Saw
Drill

Cuts:
~2 of the 2x4's cut at 4ft even (frame)
~2 of the 2x4's cut at  29in (frame)
~14 of the 1x4's cut at 36in (Top)
~4 of the 2x4's cut at 30 in (Legs)


Step 1: Sand like you have never sanded before after you break your pallet down and do your cuts.
little tip because I hate sanding more than I despise justin beiber is make your cuts and only sand what you need. I got ambitious and sanded everything now its a task that makes me wanna gouge my eyes out with a hot fireplace poker (but that's just me).


Step 2: Make your Frame
pretty much just screw together all 4 frame pieces you cut (sorry I don't have a pic for that)
use the 29" 2x4 for the inside of frame. Use the 3" screws for this.
Step 3: Paint your slats for top


Step 4: Add Legs...I painted my slats for the top before adding the legs in the interest of saving time
while they were drying I added the legs using 3" in screws and predrilled my holes.

Step 5: Paint the frame and the legs

Step 6: After everything was dry I took all the slats and positioned them where I wanted them on the table BEFORE I started screwing them in (its not rocket science)
After I decided how they were going to be placed I used the 2" screws to screw them on and wah lah!!
Step 7: I used acrylic to seal because its going outside. I started using shellac but it made the paint look dirty so switched to acrylic

Plastic outdoor chairs.... boring to bright!!

One of the easiest things I came across to do to my backyard was plastic chairs they are $5 bucks at most places. I bought 4 had 2. The 2 that I had were cracked baby blue that have seen better days. I took some spray paint in bright colors and spray painted those suckers giving them some character. They also go with the table I made with pallets. Any who here they are:

Supplies:
Spray Paint (rustoleum was best imo)
Plastic patio chairs
plastic (this is to keep your grass from turning another color you will see in the pic I learned my lesson too late lol)


The before and the table is a donated piece from my FIL left the top red but used the leftover purple for the legs 
 See my pretty purple grass? I am really not sure what happened to the baby blue chair maybe I did not do it yet.
  This is the bee's knees!!! I love rustoleum products I tried the "other" brand and it was a pain in the tush!!